Gardening in Sydney's Clay Soil
Most Sydney gardens sit on heavy clay. Here is how to work with it, not against it.
If you've ever dug a hole in a Sydney backyard and hit a grey, sticky layer that clumps together and refuses to drain, you've met Sydney clay. Most of the city, from Parramatta to the Hills District, from the Inner West to Western Sydney, is built on shale-derived clay soils that are heavy, poorly drained, and difficult to work.
The good news: clay soil is actually nutrient-rich. It holds minerals and moisture better than sandy soil. The challenge is structure, getting air, water, and roots into it. With the right approach, clay soil becomes productive garden soil within 2 to 3 seasons.
Understanding Sydney's Soil Types
Sydney has two main underlying rock types, and they produce very different soils:
- Wianamatta shale: Produces the heavy grey-brown clay that most Sydney gardeners deal with. Found across Western Sydney (Penrith, Blacktown, Liverpool), the Hills District (Castle Hill, Baulkham Hills), parts of the Inner West (Strathfield, Burwood), and the upper North Shore (Epping, Hornsby). This soil is often sodic (high in sodium), which makes it even harder to work.
- Hawkesbury sandstone: Produces lighter, sandier soils. Found in the Eastern Suburbs, Northern Beaches, parts of the lower North Shore (Mosman, Cremorne), and Sutherland Shire headlands. Sandy soil has the opposite problem: it drains too fast and holds few nutrients. Add compost to improve water and nutrient retention.
Many Sydney gardens have a mix of both, sometimes within the same backyard. Dig a test hole in several spots to see what you're working with.
Step 1: Test Whether Your Clay is Sodic
Sodic clay is clay with high sodium levels. The sodium causes clay particles to bind together tightly, creating a dense, impermeable layer. Sodic clay is common in Western Sydney and the Hills District.
A simple test: take a small lump of dry soil and drop it into a glass of distilled water. Leave it for 24 hours. If the water turns cloudy and milky, the clay is dispersive (likely sodic). If the lump stays intact and the water stays clear, it's non-sodic.
This matters because the treatment is different. Sodic clay responds well to gypsum. Non-sodic clay responds better to compost and organic matter alone.
Step 2: Apply Gypsum (For Sodic Clay)
Gypsum (calcium sulfate) works by replacing sodium ions with calcium ions in the clay structure. This allows the clay particles to separate, creating spaces for air and water to move through.
Apply gypsum at 1 kilogram per square metre. Spread it evenly over the soil surface and water in deeply. Improvement takes 2 to 3 months. Repeat annually for 2 to 3 years for best results.
Gypsum is inexpensive (about $10 for a 20 kilogram bag at Bunnings) and safe to apply around existing plants. It does not change soil pH. It only works on sodic clay, so skip it if your test shows non-dispersive soil.
Step 3: Add Organic Matter
Compost is the universal clay improver. Whether your clay is sodic or not, adding compost improves structure, drainage, aeration, and biological activity. The organic matter creates aggregates (clumps) in the soil that allow roots, water, and air to move through.
Spread 5 to 10 centimetres of compost over the soil surface and dig it in with a garden fork to a depth of 15 to 20 centimetres. Repeat every time you replant a bed. Over 2 to 3 seasons, the soil structure transforms noticeably.
Other organic amendments that help:
- Aged cow or horse manure: Adds nitrogen and organic matter. Mix it in rather than laying it on top.
- Mushroom compost: Excellent structure builder. Slightly alkaline, so use sparingly if your soil is already alkaline.
- Worm castings: High-quality amendment that improves soil biology. Expensive for large areas, but excellent for individual planting holes and container mixes.
- Cover crops: Sow green manure crops (lupins, faba beans, mustard) in empty beds. Their roots break up clay physically. Dig them in before they flower to add organic matter.
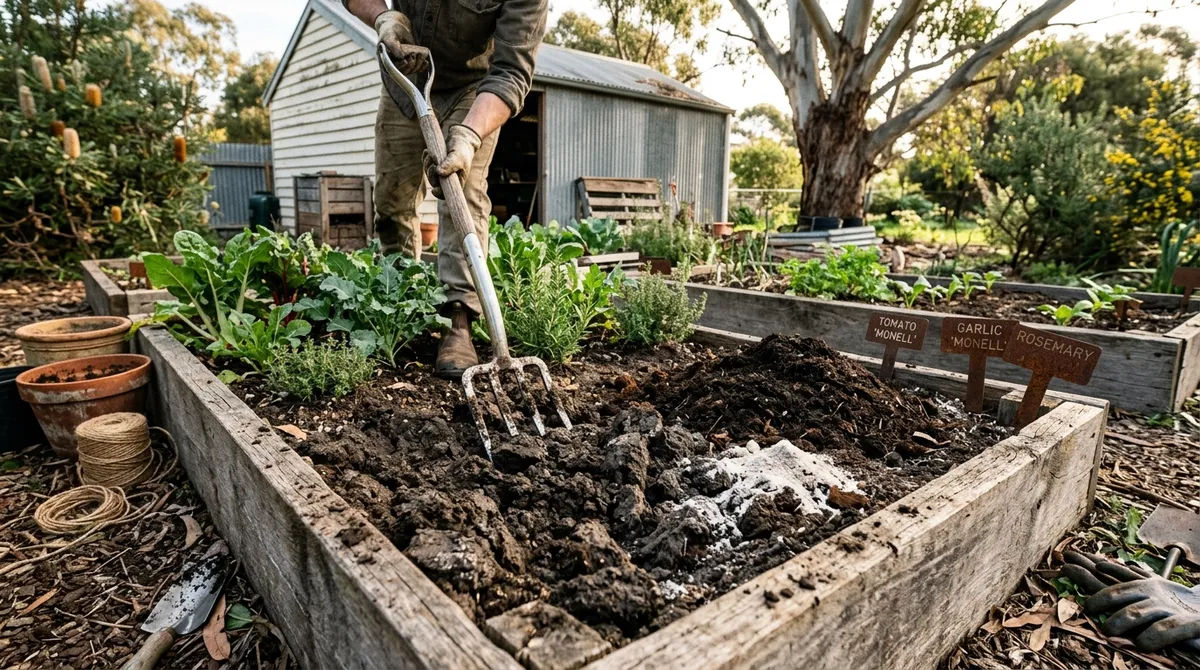
Step 4: Raise Your Beds
The fastest way to start growing in clay is to build raised beds on top of it. Fill them with a quality garden soil and compost mix, and you can plant immediately while the clay underneath slowly improves through biological activity.
A bed 30 centimetres deep is enough for most vegetables. Use untreated hardwood sleepers, corrugated iron, recycled plastic, or masonry. Avoid treated pine (CCA) for food gardens.
Fill with approximately 60% garden soil, 30% compost, and 10% aged manure. This creates a light, well-drained growing medium. Over time, worms and roots will extend into the clay beneath, gradually improving it.
What Grows Well in Clay
Some crops actually prefer heavy soil:
- Brassicas (broccoli, cabbage, cauliflower): Their large root systems anchor firmly in clay. They also prefer the moisture retention that clay provides.
- Silverbeet and kale: Tolerant of heavy, moist soils. Productive in clay that would drown other crops.
- Broad beans: Grow well in clay and improve the soil by fixing nitrogen through their root nodules.
- Citrus trees: Once established, citrus tolerate clay soil. Plant them slightly raised so the root ball sits above the clay level.
- Fig trees: Thrive in clay. Their aggressive root systems break up the soil over time.
Crops that struggle in heavy clay: carrots (fork and deform), parsnips (same problem), potatoes (need loose soil for tuber development), and any crop sensitive to wet roots (herbs like rosemary and thyme, most Mediterranean plants).
Long-Term Soil Building
Improving clay soil is a process that takes years, not weeks. Each season of adding compost, growing cover crops, and mulching brings incremental improvement. After 3 to 5 years of consistent work, heavy clay transforms into a dark, crumbly, well-draining soil that grows anything.
The key habits:
- Add compost every time you replant
- Never leave soil bare. Mulch or plant a cover crop.
- Avoid digging when the soil is wet (it destroys the structure you've built)
- Let worms do the mixing. They're more effective than a shovel.
Get Sydney-Specific Growing Advice
The Planting Season app includes soil preparation guides and planting calendars tailored to your Sydney suburb.
Open the Planting Season AppFrequently Asked Questions
Why is Sydney soil so heavy and clay-like?
Most of Sydney sits on shale-derived soils, which produce heavy, grey-brown clay. Areas built on Wianamatta shale (Western Sydney, Hills District, parts of the North Shore) have the heaviest clay. Sandstone areas (Eastern Suburbs, Northern Beaches) have lighter, sandier soils. The clay content determines how much improvement your soil needs.
Does gypsum actually work on Sydney clay soil?
Gypsum works on sodic clay, which is common in Western Sydney and the Hills District. Sodic clay contains high sodium levels that cause the clay particles to bind tightly. Gypsum (calcium sulfate) replaces the sodium with calcium, allowing the clay to break apart. Apply 1 kilogram per square metre and water in. Test your soil first; gypsum does nothing for non-sodic clay.
Should I use raised beds in Sydney?
Raised beds are the fastest way to start growing in heavy clay. Fill them with a quality garden soil and compost mix, and you can plant immediately while working on improving the ground soil underneath over time. A bed 30 centimetres deep is sufficient for most vegetables.
What vegetables grow well in clay soil in Sydney?
Brassicas (broccoli, cabbage, cauliflower) grow well in clay because their roots anchor firmly. Silverbeet, kale, and broad beans tolerate clay. Root vegetables (carrots, beetroot, parsnip) struggle in heavy clay because the dense soil deforms roots. Grow root crops in raised beds or deeply amended soil.
Free Monthly Planting Calendar
Get a personalised email each month with what to plant, seasonal tips, and harvest reminders for your region.
We send one email per month. Unsubscribe any time.